Dear readers, let’s know How to Underline and Justify Text in WordPress Post Editor, how to justify text in wordpress block editor, how to align text in blogger, how to justify text in wordpress, wordpress justify text plugin
Do you want to justify the text of your article and give an underline under any text? In this article, I will tell you how to Underline and Justify Text in WordPress Post Editor.
Underline & Justify Text in Gutenberg Editor
1 Use the keyboard shortcut “Alt-Shift-J” to justify selected text.
2. Go to Posts >> All Posts which you want to justify. Then follow the screenshot.
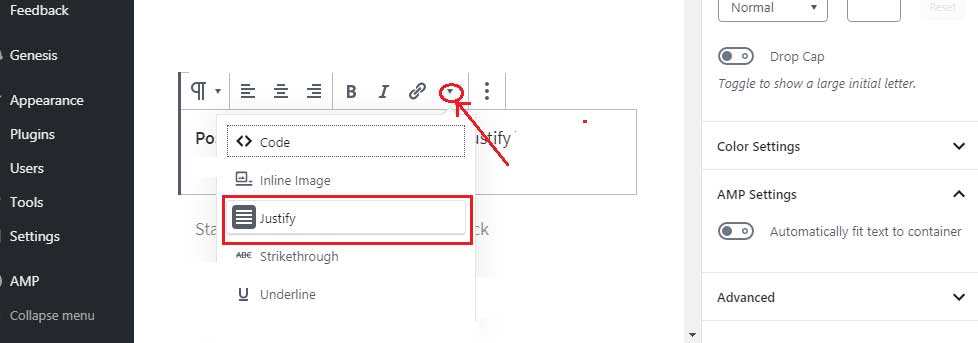
If you want to Justify your entire article, then you have to set Justify for each block.
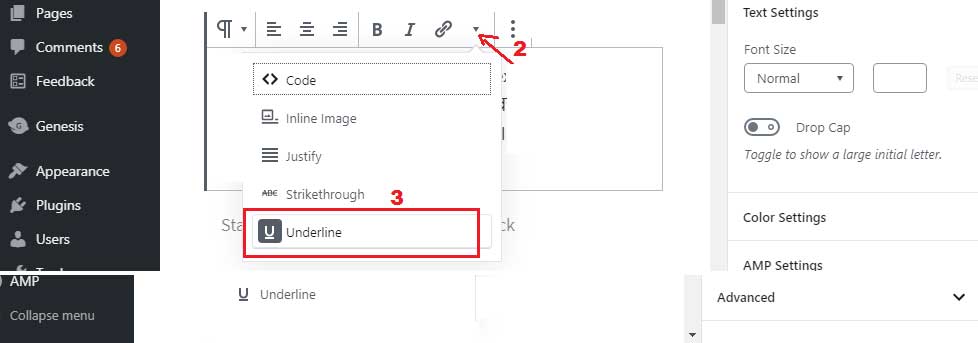
And if you want to set Underline for any text or sentence in your article, then first you have to select that text or sentence. Then follow the screenshot.
Justify or Underline Text Using TinyMCE Advanced Plugin
The TinyMCE Advanced plugin will make it easy to add underline and justify to your post editor.
This plugin can add not only underline and justify buttons to your WordPress post editor, but much more.
First, install and activate the TinyMCE Advanced plugin on your site.
After activating the plugin, click on Settings >> TinyMCE Advanced.
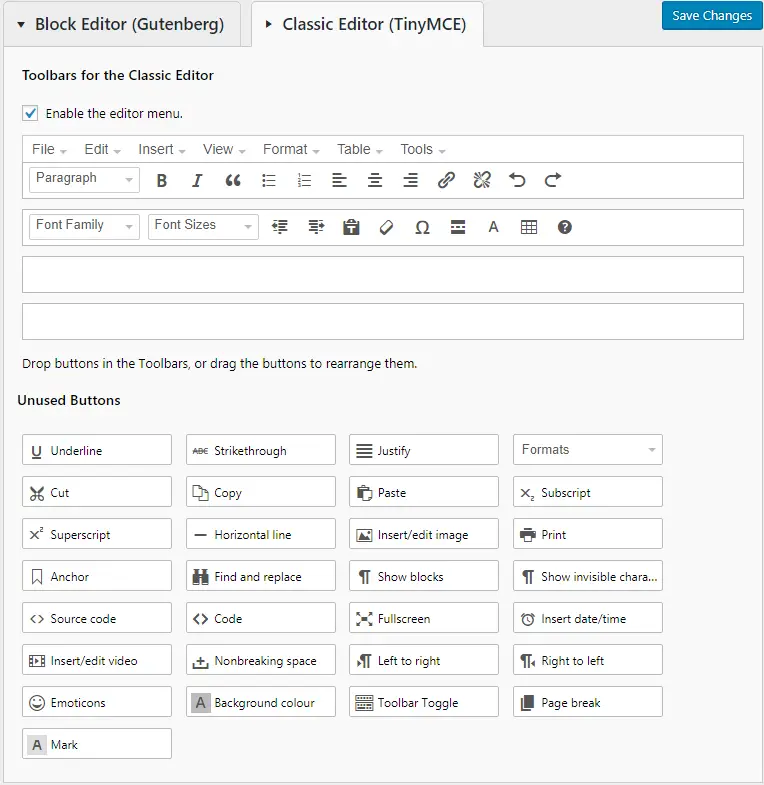
Now you need to drag-drop the Underline and Justify buttons or any other button as per your requirement into the post editor from the ‘Unused Buttons‘ box.
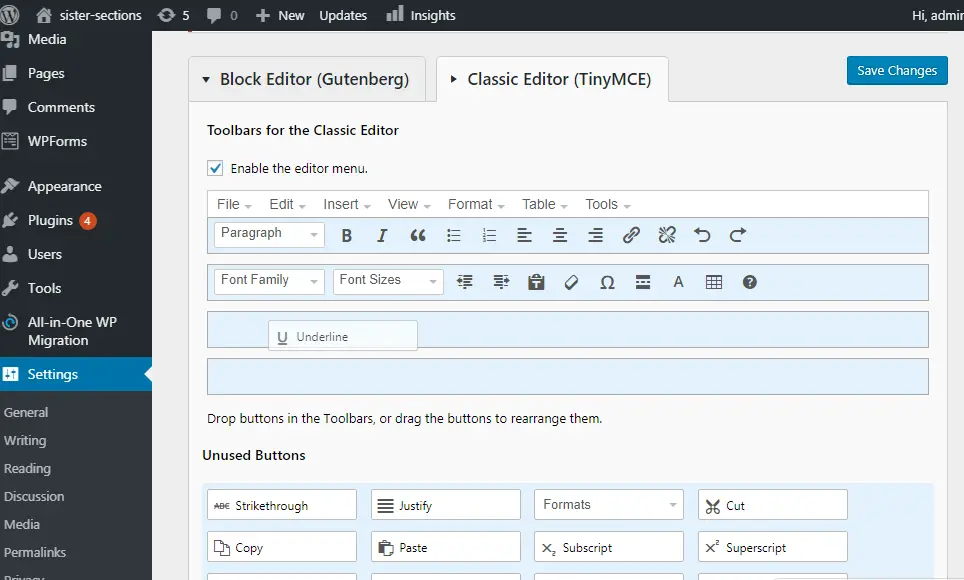
After drag-dropping the Underline and Justify buttons into your post editor, click on the “Save Changes” button.
Read more article:
- Top 10 High CPC Adsense Niches and Keywords in 2022
- How to earn money from blogging in 2022? 10 Best Ways
- What is Google Adsense Auto Ads – How to Work, Enable?
- What is Blogging – How to Start Blogging? Guide 2022
- What is Technical SEO? Technical SEO Checklist 2022
Now when you create a new post or edit an existing post, you will notice that your default WordPress editor has been replaced by the TinyMCE Advanced editor.

