Hi dear readers, hope you are doing well, today we will know about How to Backup WordPress Website with BackWPup, How to Use BackWPup Plugin, WordPress Website Backup, With BackWPup Backup WordPress Website
Regular WordPress backup is very important for every blogger/webmaster. It helps to avoid any threat to your site.
In this article, I will tell you how to do a complete backup of WordPress site with the help of BackWPup Plugin.
How To Do Full WordPress Backup Using BackWPup Plugin
To do a complete backup of your WordPress site, first install and activate the BackWPup plugin on your site.
When you activate the BackWPup plugin, it will add a new menu item to your WordPress dashboard with the name BackWPup.
1. Manually Backing Up WordPress from BackWPup
First click on BackWPup >> Add New Job.
General
Enter a name for your job. In the Job Tasks section, check the options (Database backup, File backup, WordPress XML export, Installed plugins list, Check database tables) that you want to back up.

After this, you have to choose Archive Format. The default option is tar.gz, but you can change this if you want.
Then, you will see the Job Destination option. It allows you to store your WordPress backup files on Server, Dropbox, Amazon S3, Windows Azure, Rackspace, and SugarSync etc. Also you can send your backup to email.
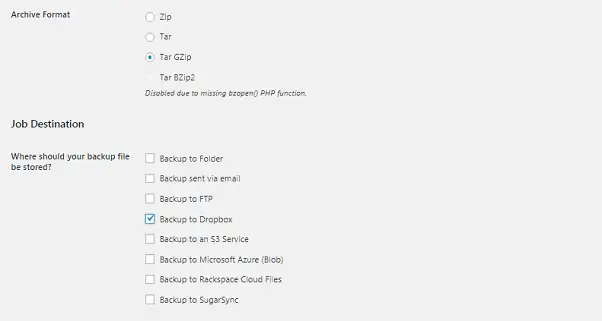
I would advise you not to store your WordPress backup file on your server. Use any 3rd party services.
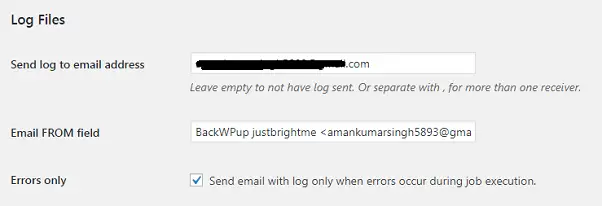
In the In Log Files section, enter your email address.
Schedule
In Schedule tab, select Manually only option.

DB Backup
To take a full backup of your WordPress site, select all the tables in the DB Backup tab.
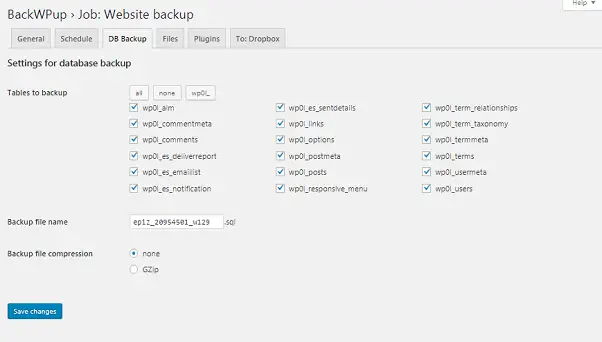
Now click on Save Changes button.
After this you have to click on BackWPup >> Job menu. Here the job created by you will appear. Just click on Run now. Your WordPress backup process will start.

Click on BackWPup >> Logs to see WordPress Backup. You can also download your backup to your computer or Mac.
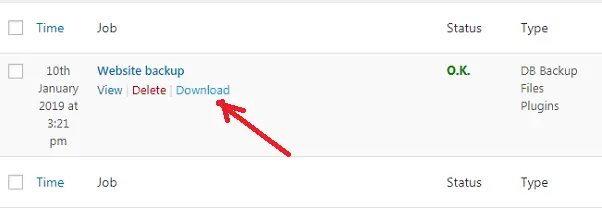
Also, you can download it from public_html >> wp-content >> uploads >> backwpup-xxxx-backups folder by logging into your cPanel.
2. Transfer WordPress Backup to Dropbox
If you store your WordPress website backup on your server, then your server may be down.
Therefore, use a 3rd-party service to store your WordPress website backup. The BackWPup plugin allows the use of several 3rd-party services (Dropbox, Email, Rackspace Cloud Files, Microsoft Azure).
Here I will be using Dropbox to store WordPress backup. Dropbox is a very good and trusted cloud storage service.
To back up WordPress site on Dropbox, click on General tab >> Job Destination >> Select Backup to Dropbox.
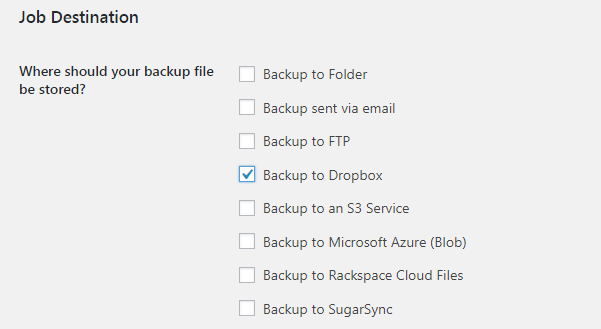
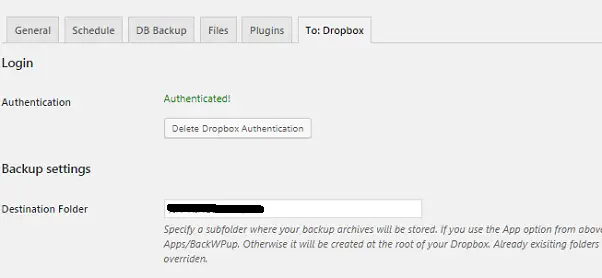
You will now see a new To: Dropbox menu item in the tab.
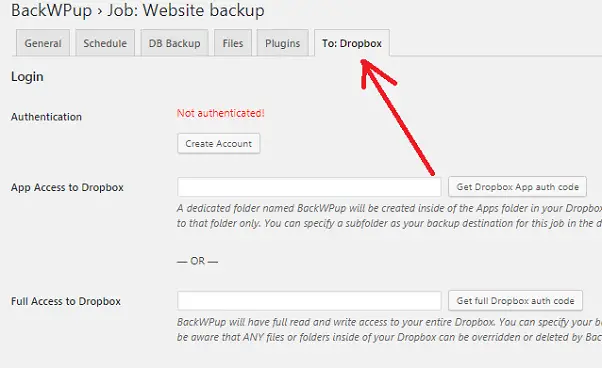
If you already have this Dropbox account, click on Get Dropbox App auth code. Or click on Create Account to create a new account.
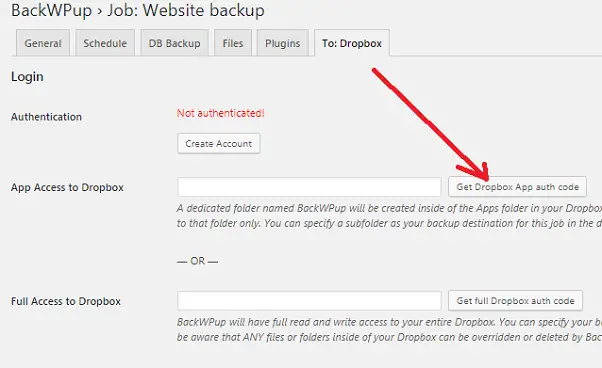
Now a popup will appear in front of you. Here you have to sign in your Dropbox. After signing in again, a popup will appear in front of you, in which you will have to click on the Allow button.
As soon as you click on Allow, you will see a code. Copy the code and paste it in the Get Dropbox App auth code box and click on Save Changes.
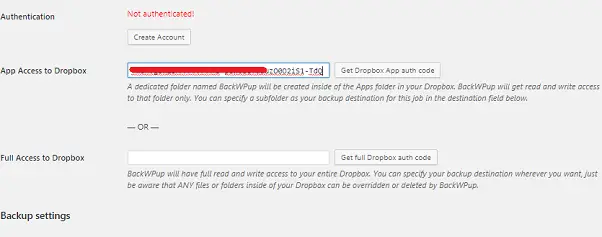
Now your Dropbox will be authenticated and you will be able to store your WordPress site backup on Dropbox.
3. Taking Automatic WordPress Backup with BackWPup Plugin
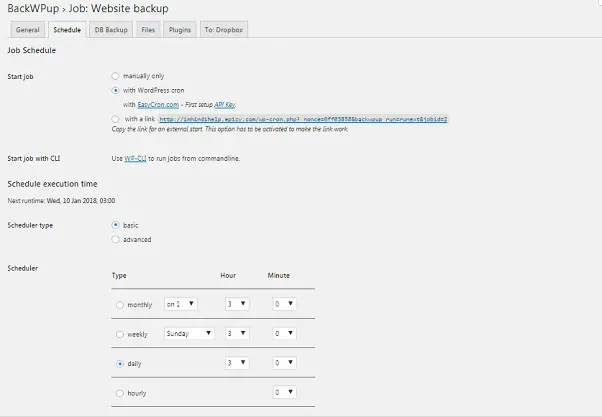
For automatic backup, select the with WordPress cron option in the Schedule tab and set a time to backup the website.
Read more article here:
- What is Akismet Plugin and How to Use it?
- All in One SEO Pack vs Yoast SEO – Campare 2023
- Rank Math SEO Review 2023 – Rank Math SEO vs Yoast SEO
- How To Setup WP Super Cache Plugin (Updated) 2023
- Best Backlink Checker Tools 2023 – How to Check Backlinks
A small request, if this article has been helpful for you, do not forget to share it!

